How to Install OpenClaw: 4 Routes, and the One Flag Most Guides Leave Out
The fastest route to run the official installer script. On macOS, Linux or Windows Subsystem for Linux, that is a curl command piped to bash from openclaw.ai. On Windows PowerShell it is the iwr equivalent. The script provisions a supported Node runtime for you and then walks you through onboarding.
That is the whole answer for most people, and I would use it.
If you manage Node yourself and prefer the npm package, read the second route carefully. The command in almost every guide currently ranking for this search is missing a flag, and whether you need that flag depends on your npm version. Copy the wrong version and the install fails with an error that does not explain itself.
I checked the project's own README rather than other tutorials, and this article reflects that.
Two Minutes of Checks That Prevent Most Failures
Every install guide I read puts troubleshooting at the bottom. I would rather stop the failures happening.
Run these three commands before you install anything.
node --version
npm --version
echo $SHELL
Node version. OpenClaw requires Node 22.22.3 or later, 24.15 or later, or 25.9 or later. Note that these are specific patch versions, not simply "Node 22 or above". Several popular guides say Node 20 is enough. It is not.
npm version. Write this number down. It decides which install command you need, and it is the single most common cause of a failed install. More on this below.
Your shell. If you are on Windows and this returns nothing, you are in PowerShell rather than WSL, which is fine but changes which command you use.
If your Node version is too old, install a current one from nodejs.org or use a version manager such as nvm or fnm. Do that first. Installing OpenClaw on an unsupported Node is the fastest way to a confusing afternoon.
Choosing Your Route
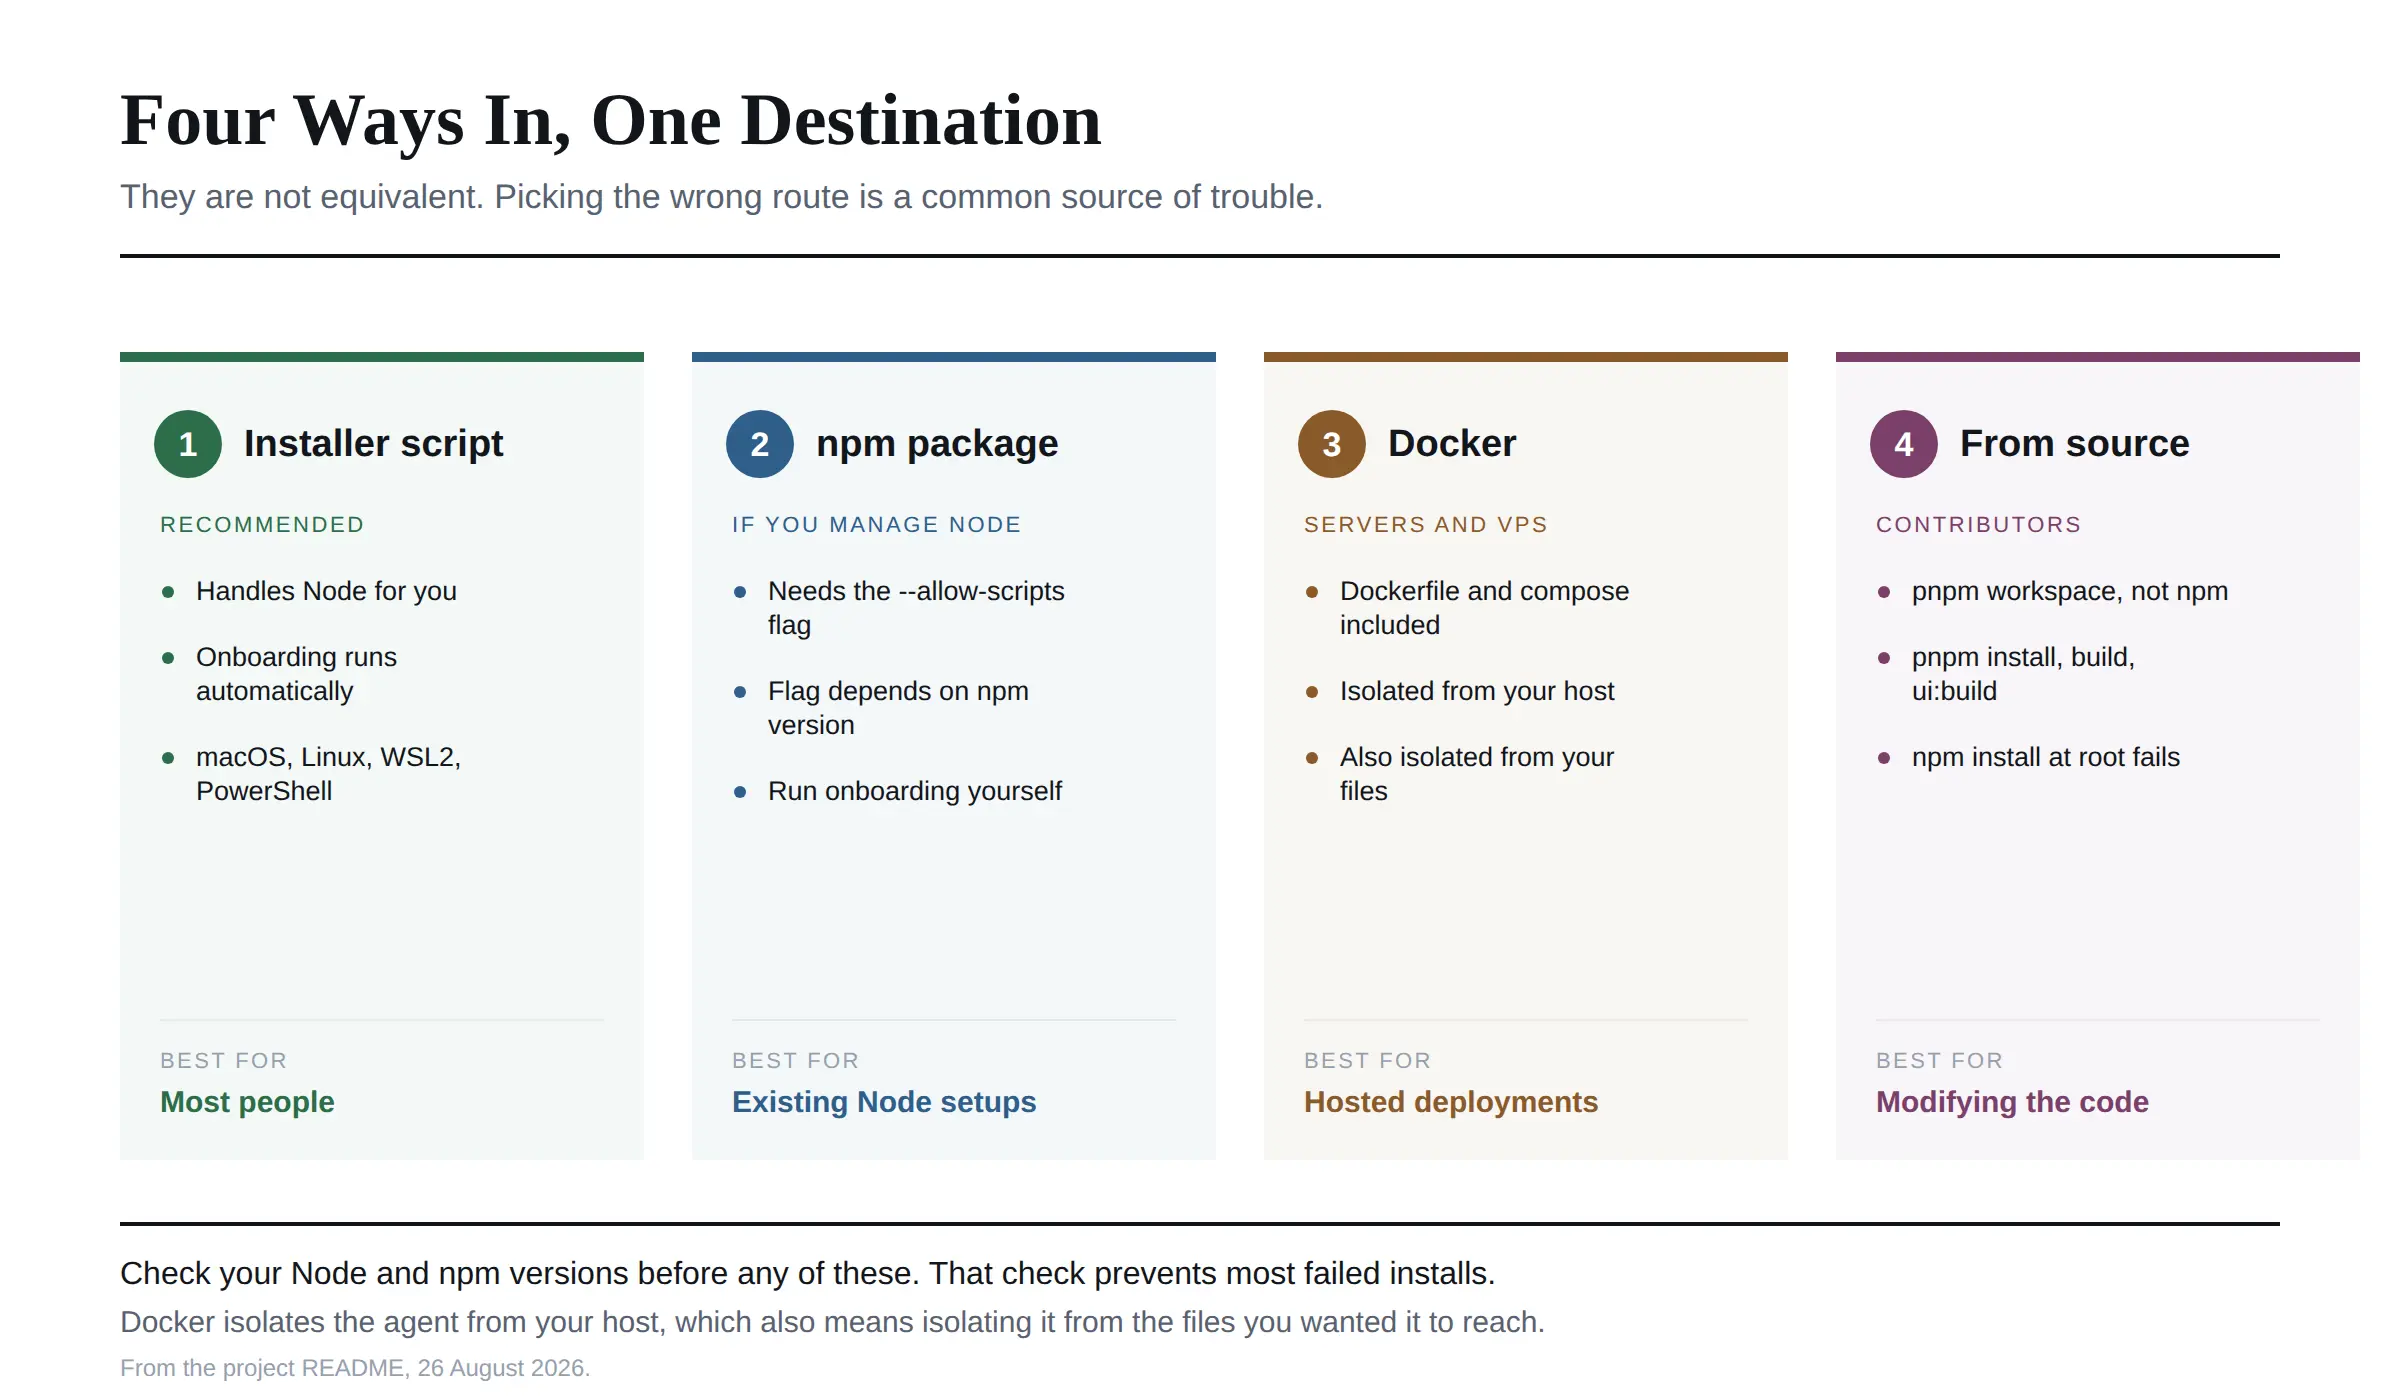
Four ways in. I would not treat them as equivalent, and picking wrong is the second most common source of trouble I saw.
 Route One: The Installer Script
This is what the project recommends and what I would use unless you have a reason not to.
On macOS, Linux or WSL2, open a terminal and run the installer from openclaw.ai using curl piped to bash. On Windows PowerShell, use the iwr and iex equivalent from the same domain.
The script checks your system, provisions a supported Node runtime if you do not have one, installs OpenClaw, and starts onboarding automatically.
That last part matters. With this route you do not run a separate onboarding command. It happens for you.
During onboarding you will be asked to bind the Gateway to a network interface. Choose the loopback interface unless you specifically need remote access, because loopback keeps the Gateway reachable only from the machine it runs on. You will then pick a model provider and enter a key, or point it at a local model.
Route Two: npm, and the Flag Everyone Drops
If you already manage Node yourself, install the package globally.
The documented command is:
npm install -g openclaw@latest --allow-scripts=openclawHere is the part that breaks people, and I have not seen a single competing guide mention it.
That --allow-scripts flag is required on npm 12 and on npm 11.16 or later. On npm 11.15 and earlier you must leave it off entirely, because those versions do not recognise the flag.
So the same copied command fails on one npm version and fails differently on the other, and neither error message tells you the flag is the problem. This is why you checked your npm version two minutes ago.
After the package install, you run onboarding yourself:
openclaw onboard --install-daemonNote that command carefully. Several guides tell you to run openclaw init. I could not find that command anywhere in the project's own documentation, and I would not trust a guide that recommends it.
Route Three: Docker
Useful if you want the whole thing isolated from your host system, or if your machine has Node conflicts you do not want to untangle.
The repository ships a Dockerfile and a docker-compose configuration at the root, along with Fly and Render configurations for hosted deployment.
I would treat Docker as the sensible choice for a server or a VPS and the unnecessary choice for a personal laptop, where the installer script is simpler and gives the agent direct access to your files, which is usually the point.
One caution. Sandboxing OpenClaw in a container also sandboxes it away from the local files and desktop apps you probably wanted it to reach. Decide which you want before you pick this route.
Route Four: From Source
For contributors, or anyone who wants to run a modified build.
There is one gotcha stated plainly in the README and repeated almost nowhere else: plain npm install at the repository root is not supported. The project is a pnpm workspace.
The documented sequence is to clone the repository, then run pnpm install, pnpm build, and pnpm ui:build.
If you have run npm install at the root and are now looking at a wall of errors, that is why. Delete node_modules and start again with pnpm. I went through the repository structure in more detail in our OpenClaw GitHub guide.
Confirming It Worked
I would not assume a silent install succeeded. Three commands tell you where you stand.
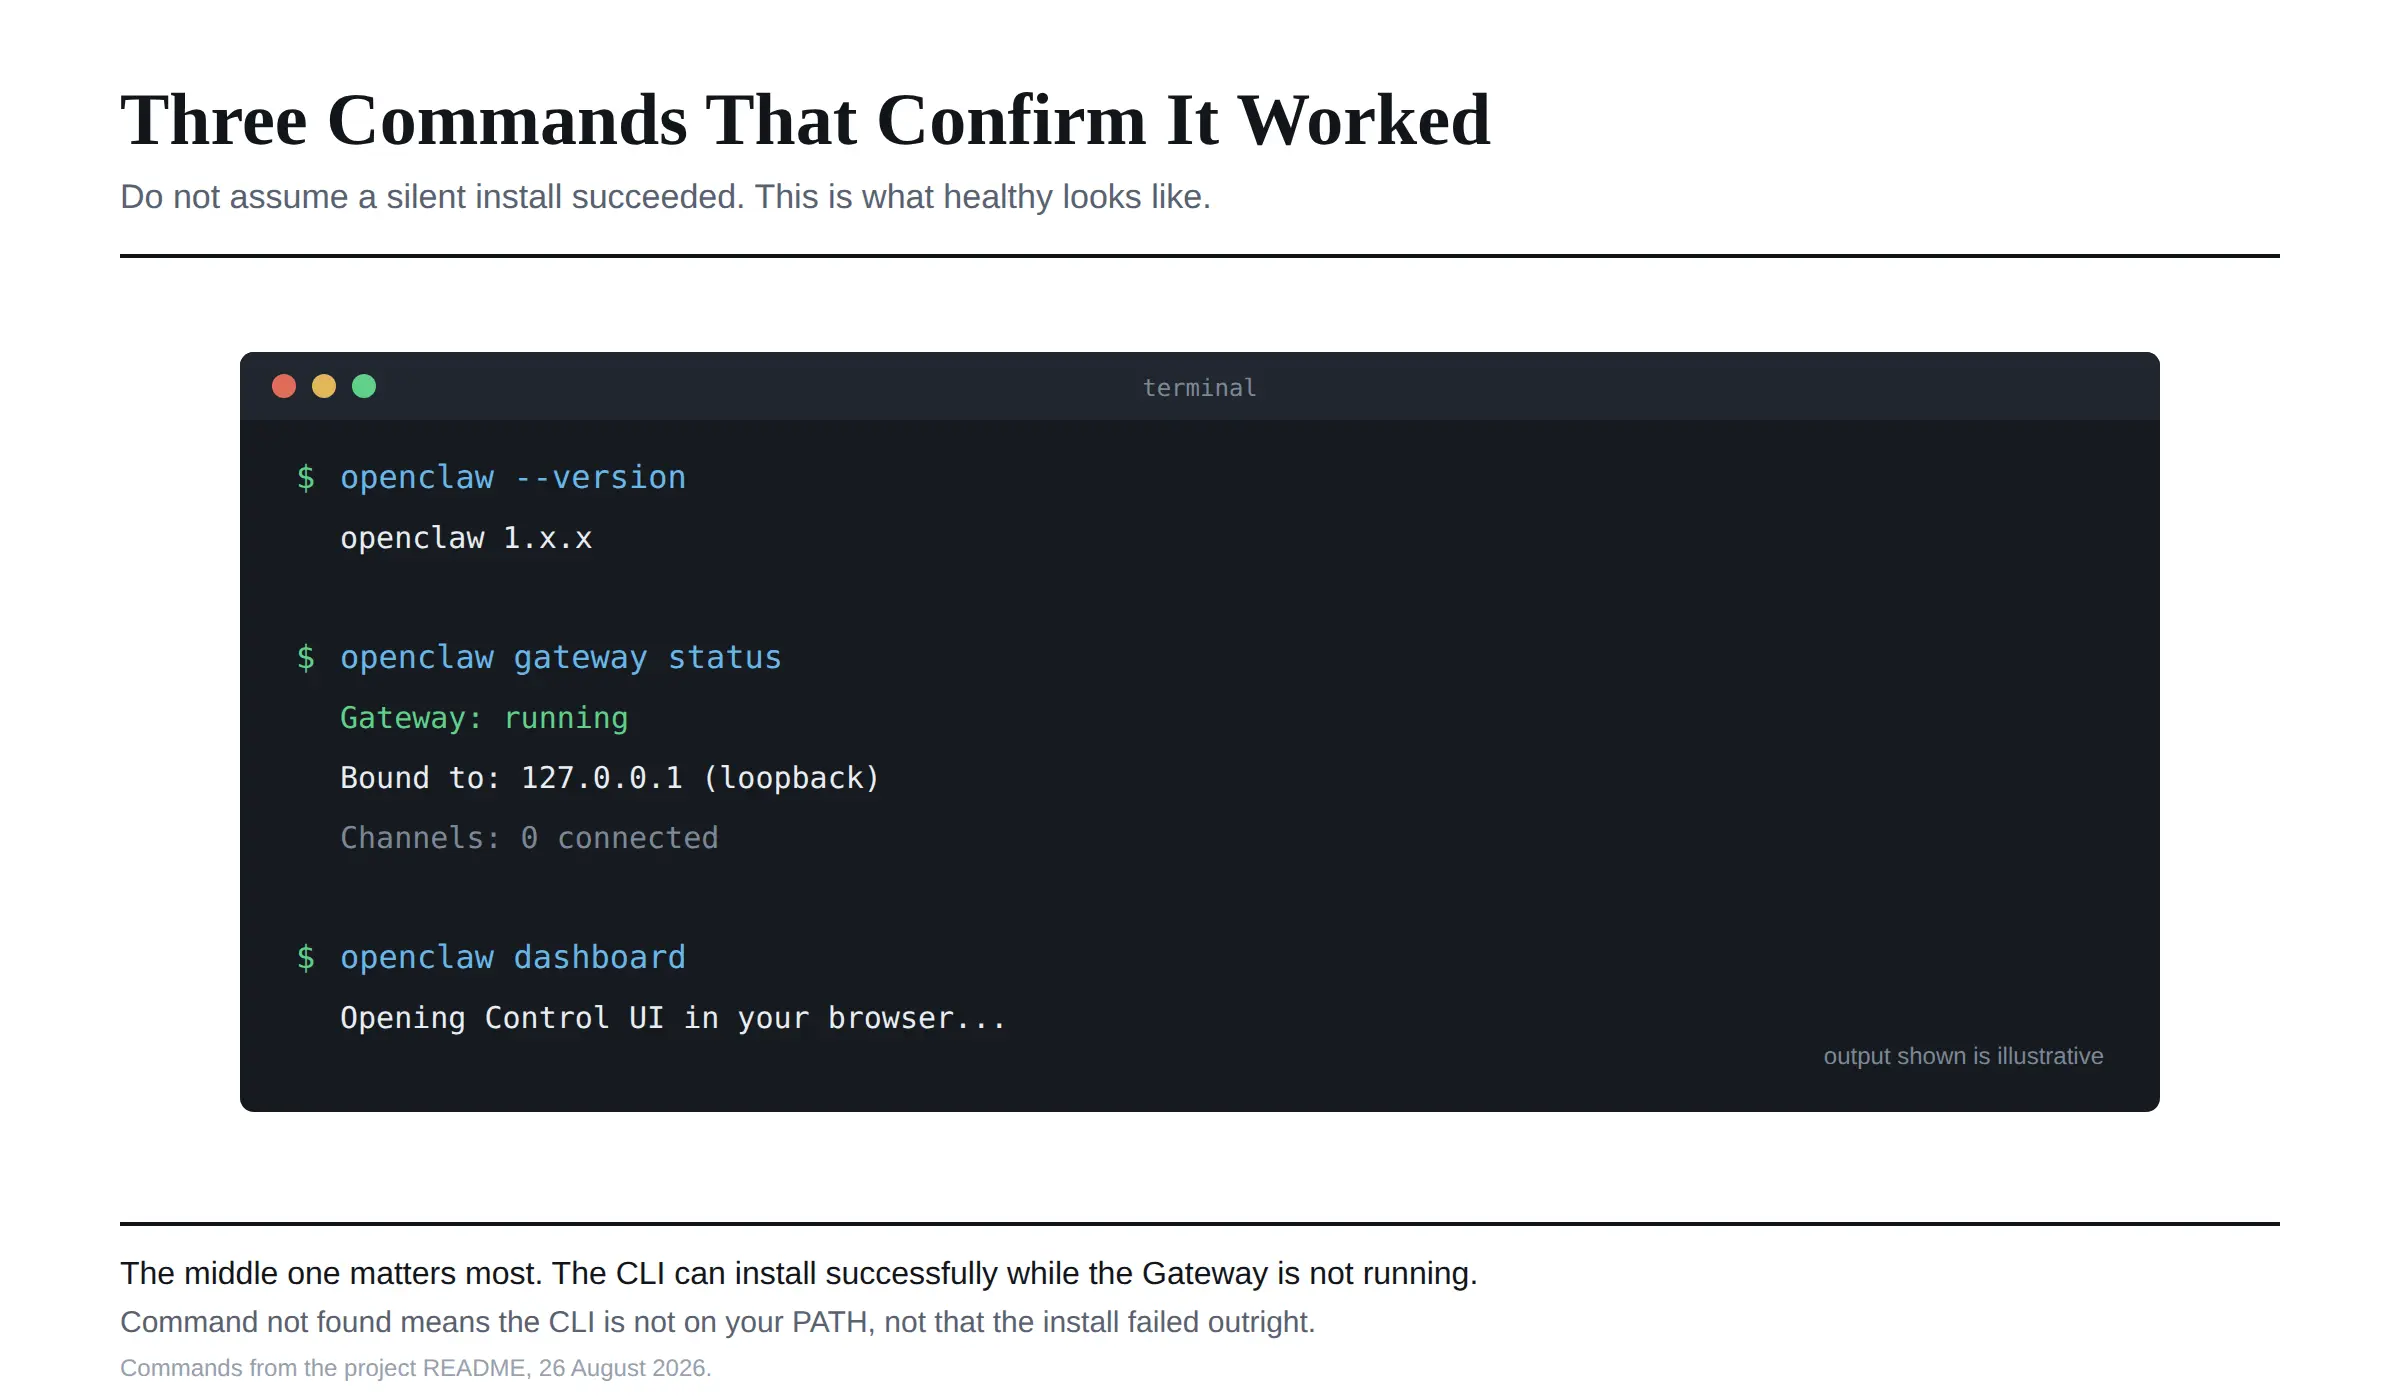
openclaw --version confirms the CLI is on your PATH. If this returns command not found, the install did not complete or your PATH does not include the npm global bin directory.
openclaw gateway status confirms the background service is running. This is the one I would actually check, because the CLI can be installed while the Gateway is not running.
openclaw dashboard opens the Control UI in your browser. If that loads, you are done.
The Errors You Will Actually Hit
Five failures account for most of what goes wrong, based on what I found reported by the project and its community.
openclaw: command not found. The package installed but the CLI is not on your PATH. On Windows the config directory lives under your user profile in a .openclaw folder, and the Node installer normally adds the global bin directory to PATH. If it did not, add it manually.
An npm error mentioning scripts or an unknown option. Your flag does not match your npm version. Check npm --version and either add or remove --allow-scripts=openclaw accordingly.
A Node version error. You are below 22.22.3, or on a 24.x or 25.x release earlier than the supported patch. Upgrade rather than trying to force it.
spawn npm ENOENT, or a PowerShell execution policy block. These are Windows-specific, and the fix I would reach for first is switching to WSL2, which the project treats as the primary Windows path.
Gateway connect failed, pairing required. The Gateway is running but has not paired with your client. This is expected behaviour rather than a bug. Channels that accept direct messages pair unknown senders by default, and you approve a pairing explicitly with openclaw pairing approve followed by the channel and code.
If none of these fit, collect your logs and system details before asking on the project's Discord, which is where setup questions are answered. Filing a setup question in an issue tracker carrying thousands of open issues will not get you a reply.
What Not to Copy From Other Guides
I read the top-ranking install guides before writing this, and four things in them are wrong or outdated.
Node 20 is not enough. At least one widely shared guide states Node 20 or later. The requirement is 22.22.3 or later.
openclaw init is not the onboarding command. The documented command is openclaw onboard --install-daemon.
The bare npm command is incomplete on current npm versions. Every guide I checked omits --allow-scripts.
npm install does not work for source builds. Guides that tell you to clone and run npm install are describing a repository layout the project does not use.
None of this means those guides were written carelessly. It means the project has moved fast and they were accurate when published. It is a good reason to check the README yourself rather than trusting any tutorial, including this one.
Where to Put Screenshots
I would capture six moments, and each one belongs at a specific point above.
Place it in | Capture | Suggested alt text |
|---|---|---|
Pre-flight checks | Terminal showing | Checking Node and npm versions before installing OpenClaw |
Route one | The onboarding wizard's first screen with the security prompt | OpenClaw onboarding security prompt during installation |
Route one | Gateway network interface selection, loopback highlighted | Selecting the loopback interface for the OpenClaw Gateway |
Route one | The model provider selection list | Choosing a model provider during OpenClaw setup |
Confirming it worked |
| OpenClaw gateway status confirming a successful install |
Confirming it worked | The Control UI dashboard on first load | The OpenClaw dashboard after a successful installation |
Capture all six from your own installation rather than reusing someone else's. Original screenshots match your actual version, they carry more weight than borrowed images, and reusing a screenshot from another site is a copyright problem as well as an accuracy one.
Frequently Asked Questions
How do I install OpenClaw?
Run the official installer script from openclaw.ai, using curl piped to bash on macOS, Linux or WSL2, or the PowerShell equivalent on Windows. It handles Node, installation and onboarding in one pass.
What version of Node.js does OpenClaw require?
Node 22.22.3 or later, 24.15 or later, or 25.9 or later. These are specific patch versions, so "Node 22" alone may not be enough.
Can I install OpenClaw with npm?
Yes. Install it globally with the --allow-scripts=openclaw flag on npm 12 or npm 11.16 and later, and without that flag on npm 11.15 and earlier. Then run openclaw onboard --install-daemon.
How do I install OpenClaw on Windows?
Either through WSL2, which the project treats as the primary Windows path, or natively in PowerShell using the installer script. WSL2 avoids most Windows-specific errors.
Can I install OpenClaw with Docker?
Yes. The repository ships a Dockerfile and compose configuration. It suits servers and VPS deployments, though containerising it also limits the agent's access to your local files.
Can I install OpenClaw from source?
Yes, but it is a pnpm workspace. Clone the repository, then run pnpm install, pnpm build and pnpm ui:build. Plain npm install at the root is not supported.
Why is the openclaw command not found?
The CLI is not on your PATH, usually because the install did not finish or the npm global bin directory is not in your PATH. Verify with openclaw --version.
Why is my OpenClaw installation failing?
Most often a Node version below the minimum, or an npm flag mismatch. Check both versions first, since those two account for the majority of failed installs.
How do I know the install worked?
Run openclaw --version, then openclaw gateway status, then openclaw dashboard. The Gateway status check is the important one, because the CLI can install successfully while the service is not running.
Do I need an API key to install OpenClaw?
Not to install it, but you will need one during onboarding unless you point it at a locally hosted model, in which case nothing leaves your machine.
After the Install
Once the dashboard loads, I would say the setup is done and the decisions begin. Which model to connect, which channels to link, and crucially whether to sandbox the agent before giving it access to anything real.
I would take that last point seriously. The tools run on your host by default, so an install is not the end of the setup so much as the start of it. If you have not yet decided what you want the agent to be able to reach, our explainer on what OpenClaw actually is covers the trust boundary before you hand it your credentials.
Commands and version requirements above were taken from the project's own README on 26 August 2026. This project changes quickly, so if a command here fails, check the README before assuming your system is at fault.